A system storage capacity crunch is a very common issue in Windows Server 2016 and other versions, even if you allocated 100GB of space to it initially. Because Windows Updates and various other application logs write data to this partition continuously, it eventually fills up. Operating a machine when the system drive is near saturation poses significant stability risks, as the operating system can lag, restart unexpectedly, or crash completely. Windows Server 2016 displays a native low disk space alert warning message to protect operators before a total storage failure occurs. This article explains a 2-step method to fix the low disk space issue in Windows Server 2016 quickly and easily without data loss.
Step 1 - Clean Up the C Drive to Reclaim Free Space
A large volume of temporary log caches and unnecessary junk files accumulates on the system drive over time, and clearing them recovers valuable free space. To accomplish this, Windows Server 2016 includes a native Disk Cleanup wizard that removes these unneeded system files safely and quickly. While you can deploy third-party optimization software, the built-in Windows utility is highly effective for most runtime environments.
How to fix the Windows Server 2016 low disk space on the C drive with Disk Cleanup:
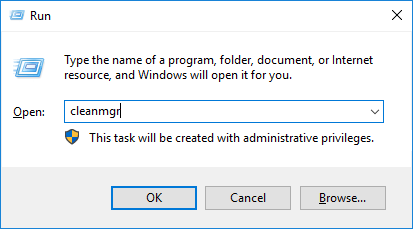
- Press Windows + R together on the keyboard to open Run, type cleanmgr and press Enter.
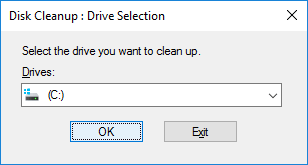
- The system drive is selected by default. Click OK to continue.
![Select C drive]()
- Select the checkboxes next to the file categories you intend to purge from the drive and click OK.
![Select files]()
- Click Delete Files in the pop-up confirmation dialog box to confirm the cleanup.
![Confirm]()
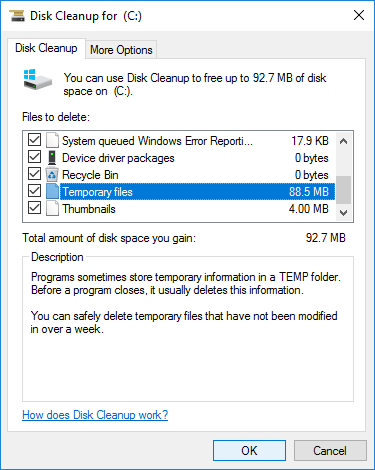
All scanned caches can be removed safely. If you are uncertain about a specific file directory, click its entry label to read the detailed text description displayed at the bottom of the interface panel.
If you have never run a disk cleanup before, you might recover several gigabytes of storage to help resolve the storage shortage temporarily. However, this cleanup is usually not enough, as newly generated temporary files can quickly consume this newly recovered storage. To resolve this permanently, you should shrink another partition and move more free space to the C drive.
Step 2 - Add More Free Space to the C Drive from Other Partitions
In most operational setups, the primary disk holds other partitions containing available free space that can be transferred onto the system drive. However, securing a verified system backup before modifying sectors remains an essential best practice, as altering partition configurations carries inherent data risks when using uncertified partitioning tools.
Unlike generic tools, NIUBI Partition Editor integrates advanced data protection mechanisms to secure enterprise hosts:
- Virtual Mode - Stages all planned disk adjustments as pending tasks for visual verification before modifications are written to physical device sectors.
- Cancel-at-will - Enforces data safety parameters, allowing you to abort active configuration workflows at any progression step without risking volume damage.
- 1-Second Rollback - Automatically snaps the host server back to its original state instantly if any software exception occurs during partition resizing.
- Hot-Clone - Duplicates partition states without stopping the machine, creating an immediately bootable fallback drive if the main system disk fails.
How to fix the Server 2016 low disk space issue by extending the C drive:
- Launch NIUBI Partition Editor, right-click drive D, and select Resize/Move Volume. Drag the left border rightward to shrink this volume and create unallocated space on its left side.
- Right-click drive C and select Resize/Move Volume again, then drag the right border rightward to absorb this adjacent unallocated space block.
- Click Apply in the upper-left corner of the master interface panel to commit and execute.
If the adjacent partition D lacks sufficient free capacity, you can contract any non-adjacent volume on the same disk layout. However, an extra step is required to move partition D rightward before you can merge the unallocated space into the system drive.
Video guide:

When managing hardware RAID 1, 5, or 10 arrays, do not adjust controller configurations or break arrays; follow the identical partition sizing steps directly. If your physical disk layout is completely full, you can choose to clone the disk to a larger one to expand the C drive using the extra space.
To completely resolve space shortages and keep the system drive running smoothly, extend the C drive as much as possible. Additional preventative strategies include:
- Install new applications directly onto a separate data partition and redirect default program file output directories away from the C drive.
- Set up a monthly schedule to run Windows Disk Cleanup to systematically clear away newly generated temporary log caches.